ChatDev
23.2k 2.9kWhat is ChatDev ?
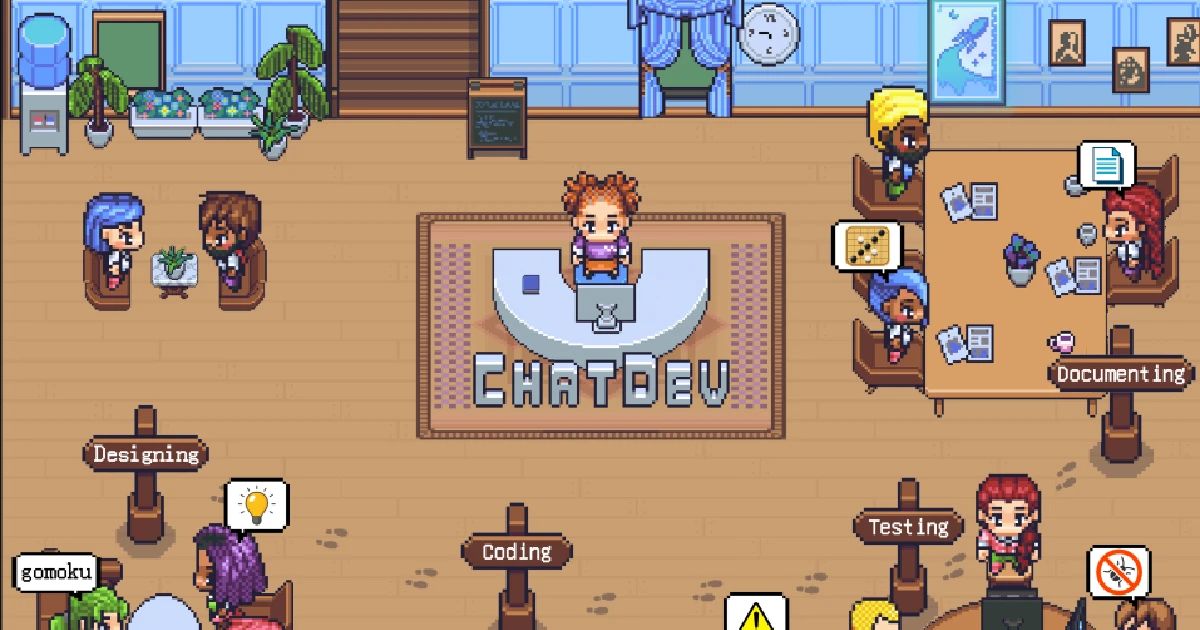
ChatDev stands as a virtual software company that operates through various intelligent agents holding different roles, including Chief Executive Officer, Chief Product Officer, Chief Technology Officer, programmer, reviewer, tester, art designer. These agents form a multi-agent organizational structure and are united by a mission to “revolutionize the digital world through programming.” The agents within ChatDev collaborate by participating in specialized functional seminars, including tasks such as designing, coding, testing, and documenting.
📖 Overview
The primary objective of ChatDev is to offer an easy-to-use, highly customizable and extendable framework, which is based on large language models (LLMs) and serves as an ideal scenario for studying collective intelligence.

⚡️ Quickstart
![]()
💻️ Quickstart with Web
Access the web page for visualization and configuration use: https://chatdev.modelbest.cn/
🖥️ Quickstart with terminal
To get started, follow these steps:
-
Clone the GitHub Repository: Begin by cloning the repository using the command:
git clone https://github.com/OpenBMB/ChatDev.git-
Set Up Python Environment: Ensure you have a version 3.9 or higher Python environment. You can create and
activate this environment using the following commands, replacing
ChatDev_conda_envwith your preferred environmentname:
   conda create -n ChatDev_conda_env python=3.9 -y
conda activate ChatDev_conda_env-
Install Dependencies: Move into the
ChatDevdirectory and install the necessary dependencies by running:
   cd ChatDev
pip3 install -r requirements.txt-
Set OpenAI API Key: Export your OpenAI API key as an environment variable. Replace
"your_OpenAI_API_key"withyour actual API key. Remember that this environment variable is session-specific, so you need to set it again if you
open a new terminal session.
On Unix/Linux:
export OPENAI_API_KEY="your_OpenAI_API_key"On Windows:
$env:OPENAI_API_KEY="your_OpenAI_API_key"-
Build Your Software: Use the following command to initiate the building of your software,
replacing
[description_of_your_idea]with your idea’s description and[project_name]with your desired projectname:
On Unix/Linux:
python3 run.py --task "[description_of_your_idea]" --name "[project_name]"On Windows:
python run.py --task "[description_of_your_idea]" --name "[project_name]"-
Run Your Software: Once generated, you can find your software in the
WareHousedirectory under a specificproject folder, such as
project_name_DefaultOrganization_timestamp. Run your software using the following commandwithin that directory:
On Unix/Linux:
   cd WareHouse/project_name_DefaultOrganization_timestamp
   python3 main.py
On Windows:
   cd WareHouse/project_name_DefaultOrganization_timestamp
   python main.py
✨️ Advanced Skills
-
An introduction to all command run parameters.
-
A straightforward guide for setting up a local web visualizer demo, which can visualize real-time logs, replayed logs, and ChatChain.
-
An overview of the ChatDev framework.
-
A comprehensive introduction to all advanced parameters in ChatChain configuration.
-
Guides for customizing ChatDev, including:
-
ChatChain: Design your own software development process (or any other process), such as
DemandAnalysis -> Coding -> Testing -> Manual. -
Phase: Design your own phase within ChatChain, like
DemandAnalysis. -
Role: Defining the various agents in your company, such as the
Chief Executive Officer.